Upper Arrow Lake Bikepacking Trip
We saw the two cute little bear cubs frolicking by a downed tree and thought nothing of it. Then the tree stood up, turned toward us, claws out and raised. And that was just the first day of our three-day bikepacking adventure.
We (your author, Alison Talbot-Kelly and Sherri Kyle) had checked out the route around Upper Arrow Lake in the BC Interior on a BC Bikepacking site—the rider had done it in a week and we were doing it in three days.
We figured we could do the 225 kilometre ride in two big days and one mellow one. Day One would feature a lot of pavement and a little gravel, Day Two would be all gravel, and Day Three would be mostly gravel with a shortish pavement finish. Starting point was in Nakusp and the big loop would bring us back to Halcyon Hot Springs, about 5 kilometres north of Nakusp, where we did a car drop.
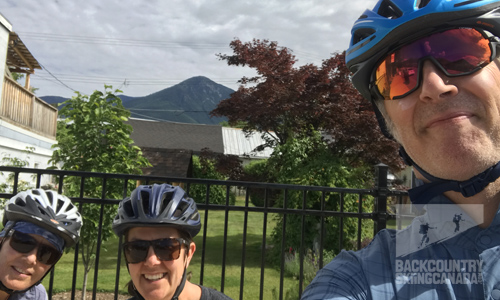
The “before” picture in Nakusp. L-R: Alison, Sherri, Andrew Creighton (the author)
- SHOW THE REST OF THE REVIEW / PHOTOS / VIDEOS
-
Day One started off in Nakusp, on the west shore of Upper Arrow Lake. I had ski toured around the area a lot so I was somewhat familiar with the terrain we’d be covering—but not that familiar. Day One’s objective was to bike 57 kilometres (km) on paved roads from Nakusp down to the Fauquier cable ferry which would take us across the lower part of the lake to Needles on the west side. Then the fun would start.
Map of Day One. Click on the image for the video overview of the route. It may take a minute to load.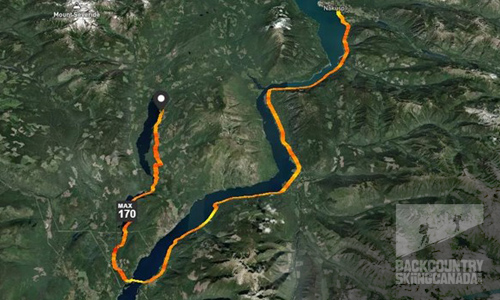
Here we are just pulling into Needles on the cable ferry. My partner Alison on the right.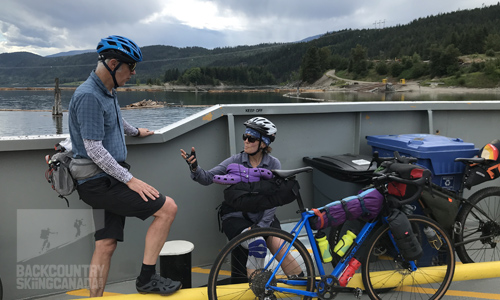
Our target that night was the north end of Whatshan Lake at the Richy Recreation Site, about 30 or so kilometres back up the west side of the lake. We peeled right, off the highway, after 2 or so kilometres (but we should have stayed on the highway longer because the forest service road (FSR) we were on ran parallel to it, gained elevation, then dropped back down to where the highway and the gravel road split). The Whatshan FSR was quite steep and here’s where we realized, profoundly, the difference between riding on paved and loose gravel. It’s also where we saw the grizzly and cubs that forced us to backtrack for about a kilometre before turning back in the right direction and hooting and hollering at high speed past the location of the bear sighting.
Blasting along one of the more scenic stretches, with Whatshan Lake at our left. The riding quality along the lake was good. Not so good right after we got off the ferry.

We were pretty spent arriving at the Richy Recreational Site after 6 hours in the saddle. The 30 km ride on gravel from Needles was easily twice as challenging at the 55 km on blacktop. The site is basic, with about eight tent sites and a lovely lake to play in. We were hot and dirty so jumped into the lake posthaste. We had dreams of a big bonfire and cards but that wasn’t going to happen. We climbed into our tents and were asleep at a little after eight, before the sun dropped.
Day Two of three was, if it went as planned, a lesser day than the first. Our intention was to make it up to the Shelter Bay Rec Site, about 8o km north. Unfortunately, we missed a right turn and wound up climbing an extra 400 m—or 14 km distance. My takeaways from that experience were: know that all FSRs have kilometre markers (so don’t think you are on the right road just because you see one) and constantly check tools (compass, altimeter, map, etc) because it’s easy to convince yourself you are on the right road even if you’re not.
Map of Day Two. Click on the image for the overview video. It may take a minute to load.
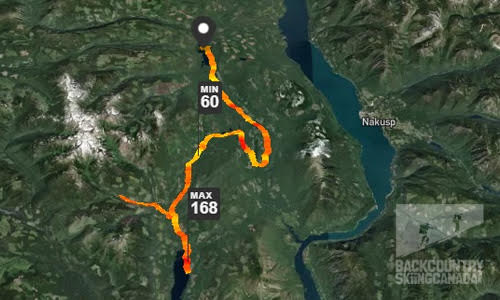
Luckily, before we hit snow and almost mistakenly summited Mt. Severide (see above), we met a group of logger/ATVers who set us straight and suggested we retrace our steps and get back on the proper route. The next leg, after we backtracked, included a pretty brutal switchback downhill portion which made us all wish we had suspension bikes.
Here we are heading the wrong way after our “dirty left.” Approaching the snowline when the map said we shouldn’t have been gaining elevation was one of many clues we missed.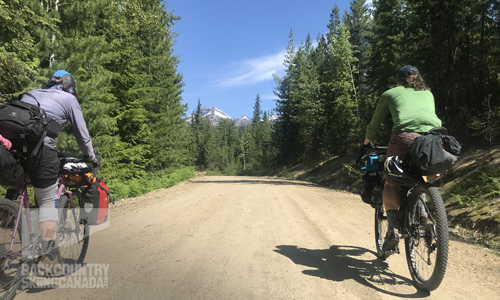 Here is Alison, after aforementioned downhill segment. Feeling a little crushed; and for good reason.
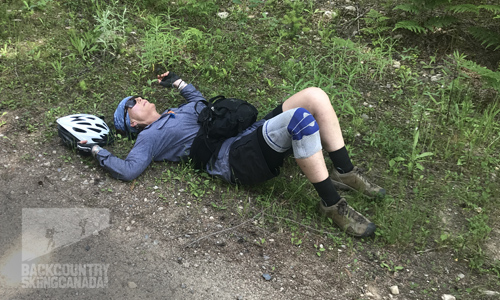
When we finally hit the West Mosquito FSR, it seemed like a major highway. This was a decision point for us. If we wanted to pull the pin, we could have headed south east, taken the Arrow Park Ferry across Lower Arrow Lake and biked north along the highway back to Nakusp. Because the road looked so nice (and it was) we decided to persevere and camp at the aptly named Mosquito Lake Rec Site, about 20 kilometres to the north.
Mosquito Lake was nice, but very mosquito-y. We built a fire in daylight to ward off the little buggers, had a nice dip in the lake, ate a dehydrated dinner and hit the hay. The tally for the day, if it’s of interest: 64 kilometres, 1170 m ascent, 1126 descent. Time in the saddle, 7 hrs, 42 mins (yikes).
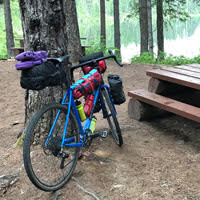
Fast tent set-up. Tent size is perfect for two.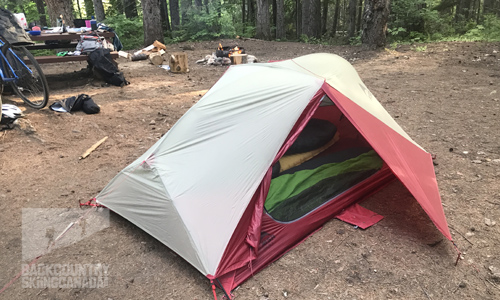 We are unabashed quilt converts for this kind of adventure
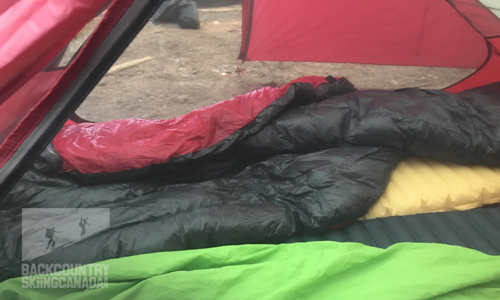
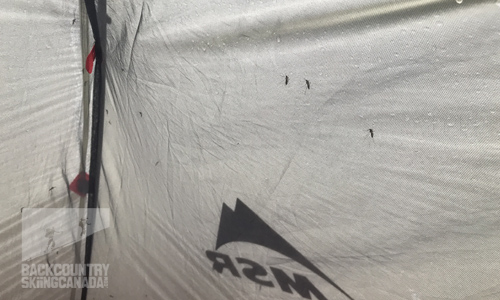
The mosquitoes kept us awake even though they were on the other side of the mesh.
 Speed breakfast for mosquito avoidance. Standard gear explosion on the picnic table.
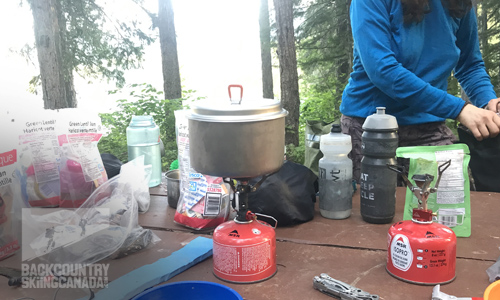 Hate to eat and run (or bike) but Mosquito Lake rapidly became hellish.
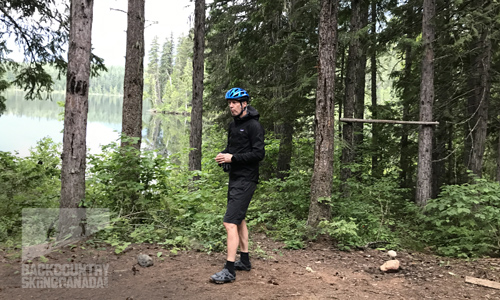
Day Three’s target was to bike from Mosquito Lake along Fosthall then Shelter Bay FSRs, up to the Upper Arrow Lakes Ferry, cross to Galena and bike the remaining 35 or so kilometres, south, along HWY 23, to Halcyon Hot Springs—where we had wisely dropped a car.
The last leg up to the ferry was one of the most scenic of the trip—with Arrow Lake and the Goat Range to the east and the Monashees to the west. On other days, a lot of the riding was on tunnel-like FSRs— so it was a pleasure to see open views on our last day. The ferry leaves Galena Bay every hour on the hour so, if you are lucky, you can avoid waiting.
Here is the nameless creek (that featured a really high trestle bridge)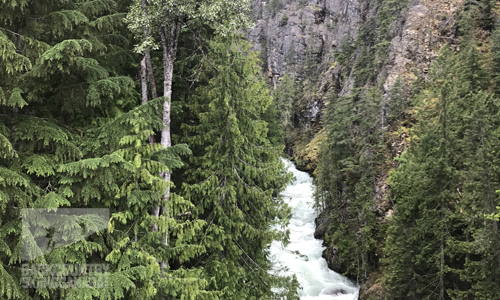 Here's Sherri leading us all to make the ferry on time.
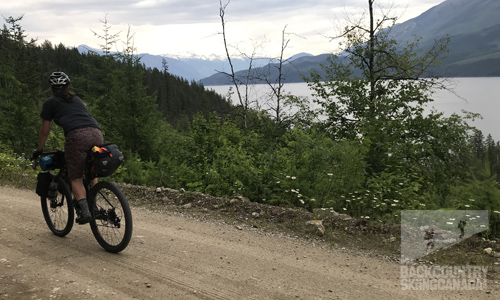 And.... back across the top of the lake thanks to the Galena/Shelter Bay Ferry.
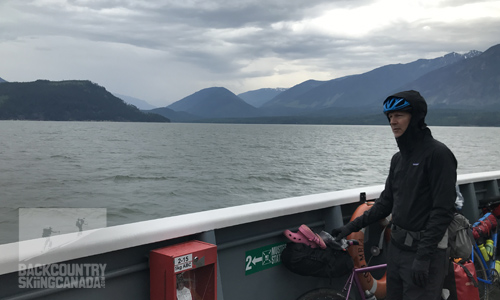 Shot across the bow.
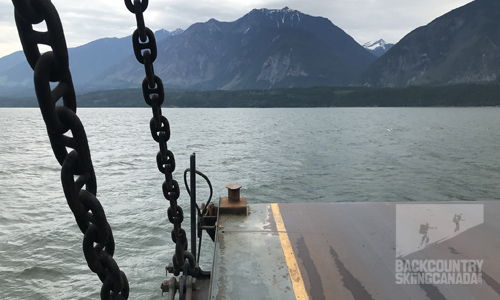
The ride back to Halcyon Hot Springs was long for that time of the day but it was great to be on smooth blacktop after riding loose gravel for so long. We stopped for a spendy soak at Halcyon, had a burger and a beer (both excellent) then headed on our way. There’s talk of doing a big loop around Trout lake to the east next time. Hopefully there will be better route finding, no grizzlies and fewer bugs.
Verdict:
This particular adventure was a lot of fun but not something I'd probably do again. Perhaps because there are so many other similar bikepacking trips to be had in the BC Interior. The crew of Alison and Sherri was top notch, which made it all good. On future trips, I would research a bit more and use technology to minimize the chances of getting off track. Because this was a first bikepacking trip (of this length), I was very happy for the experience. It was positive because the consequences of a serious issue were minimal and we had a built-in bail out option that we didn't employ.
 |
PROS:
|
 |
CONS:
|
SPECS:
Total Distance: 222 km/138 miles
Duration: 3 days 2 nights
Mechanical issues: 0
RATING: 8/10
Challenge 2/2
Camping 1.5/2
Access 1.5/2
Effort required 2/2

Did we miss something? Are we totally out to lunch? Let us know what you think. People like/dislike gear for different reasons so chime in below and we'll get a well-rounded evaluation. You'll need to login or register before you can comment but it only takes a few seconds, then you're good to go.
Leave a Comment:
Patagonia Dirt Roamer Storm Pants
These bike-specific pants work perfectly with a rider’s on-bike body position. They shed rain and keep your legs warm when the temps drop. They are light enough to throw in your bag if the skies are threatening to open up and long zippers at the ankle mean you can get into them without taking off your shoes. Pair them with merino long-john and you’ve got the perfect cold-weather set up.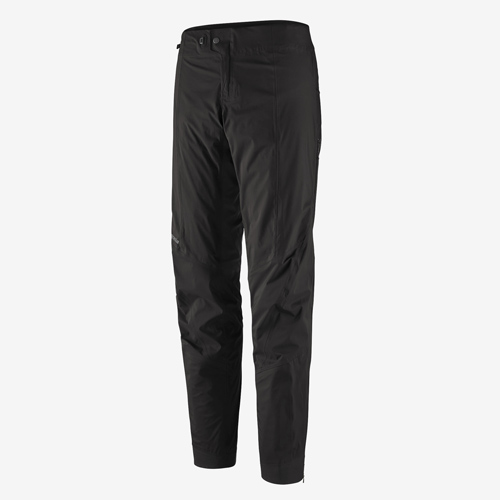
Price: $315CAN / $275US
Sizes: XS-XXL
Colours: Black

Patagonia Dirt Roamer Jacket
Another item from the dirt roamer series, the Dirt Roamer Jacket is an all around, bike- specific jacket that is very breathable. It sheds rain well but it is not entirely waterproof (like the Dirt Roamer Storm Pants are). I like the stow pocket on the jacket’s back and the stowable, helmet-compatible, fold away hood. Long arms and back mean full coverage when you are in the position. Perfect for cool summer mornings.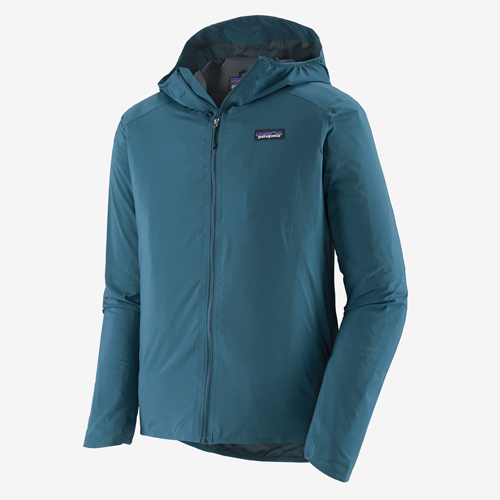
Price: $315CAN / $275US
Sizes: XS-3XXL
Colours: Basic Green, Dusky Brown, Black, Crater Blue
Patagonia Dirt Roamer Bibs
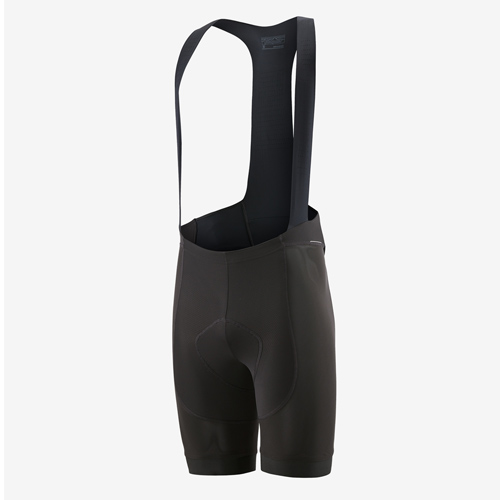
Price: $225CAN / $175US
Sizes: XS-XXL
Colours: Black
MSR Freelite 2 Tent
The Freelite 2 worked out really well for us on this trip. It held off the bugs at Mosquito Lake and fit perfectly under the top tube of my bike. If I were solo, I’d bring a bivy sack, but if you are two, the less-than-one-kilo Freelite is an excellent choice. It’d be great if MSR could offer a bikepacking specific model with shortened tent poles that’d fit on my handlebars.
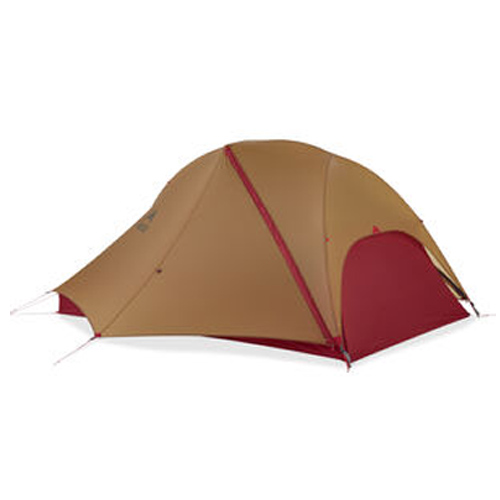
Price: $499.95CAN / $399.95US
Weight: 1.06kg / 2lbs 5oz
Colours: Saraha
Giro Helios Spherical Road Bike Helmet
Love this helmet. I had a Giro MTB helmet before this and I found it to be overkill. The Helios’s 15 vents and boa-style closure, coupled with its 270 g weight and spherical technologic means it’s safe, comfy and lightweight. The perfect companion for a three-day ride. Heck, the colour even matches my bike.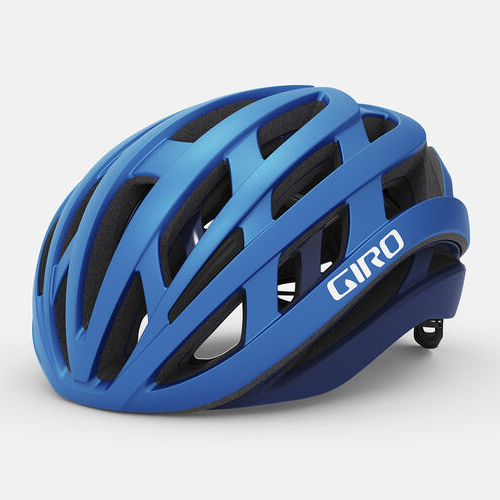
Price: $295CAN / $225US
Sizes: S, M, L
Colours: Matte And Blue, Matte Black Crossing, Matte Black Fade, Matte Black/Red, Matte Warm Black, Matte White
Giro Rincon Mountain Bike Shoes
The Rincons are a simple, stiff and relatively comfy MTB shoes that work perfectly for gravel bikepacking. I love the transfer of energy that comes with only a clipless program an he BOA system means I’m able to adjust the fit on the move. The toebox is a little small for my foot but I remedied that situation with my Leatherman Skeletool.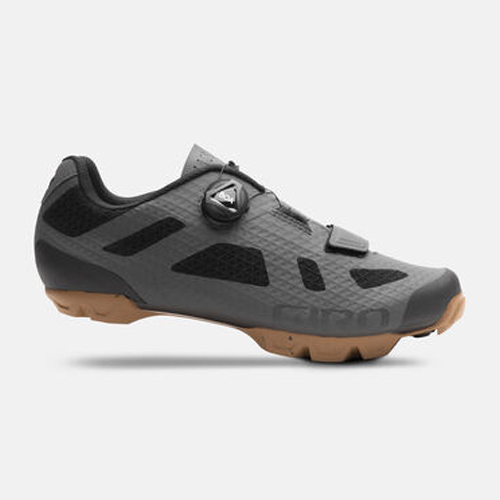
Price: $210CAN / $165US
Sizes: 39-50
Colours: Black, Dark Shadow, Olive, Porter Grey
Giro Xnetic Trail Mountain Bike Glove
I like full fingered gloves, even if it’s hot out like it was on this trip. The Xnectics have mesh venting on the side of every finger, they work with your phone’s screen and they have a little padding right where you need it. They are advertised as MTB gloves but they work fine for gravel.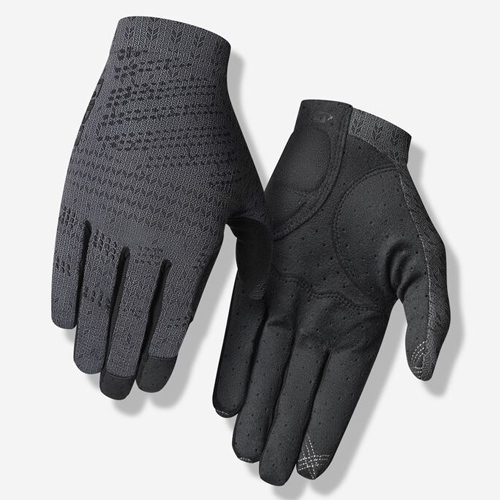
Price: $49CAN / $38US
Sizes: S-XXL
Colours: Red orange, Olive, Harbor Blue, Coal
Leatherman Skeletool Multitool
It always makes sense to bring a multitool along on a trip like this—they always come in handy. I used the blade for some minor surgery on my bike shoes and I removed a metal splinter from my calve with the needle nose pliers. The skeletool has just what you need and compliments the bike-specific multitool I also brought along.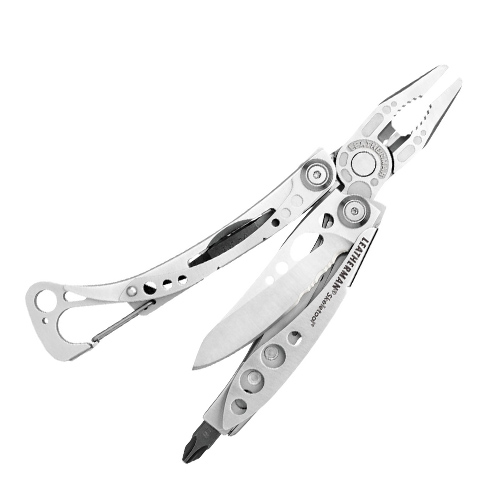
Price: $101.95CAN / $74.95US
Weight: 141g / 5oz
Colours: Stainless Steel, Tan, Blue, Green
Tifosi Sledge Sunglasses
The appeal of these shades for me was the Clarion Red Fototec lens that adjusts from nearly clear to a smoked tint with red mirror in full sun. I road with them for three days in varying weather and cloud cover—no problem. Note that the oversized styling, even with the venting, makes for a “warmer” experience than does a smaller shade with less coverage.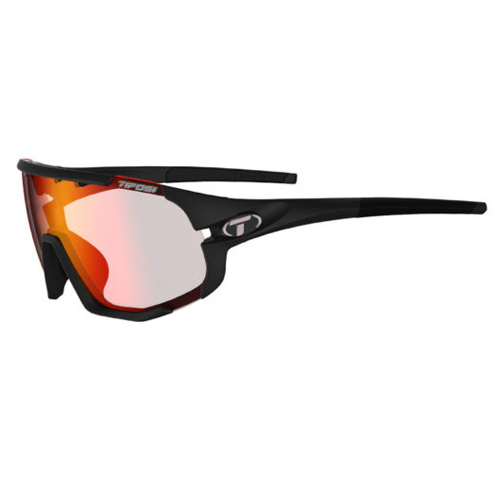
Price: $99.95CAN / $79.95US
Sizes: Medium-Large
Colours: Many
Bn3th North Shore Chamois
This Vancouver-based company has been making the North Shore Chamois model for a couple years. The idea is to combine a high performance riding chamois and other performance features with MyPakage Pouch Technology. Buy a pair to get the real story but the MyPakage concept holds your junk in its own special compartment making for a sweat-free, shiftless, all-day ride. I highly recommend them and they worked out really well on this trip. One pair, three long days.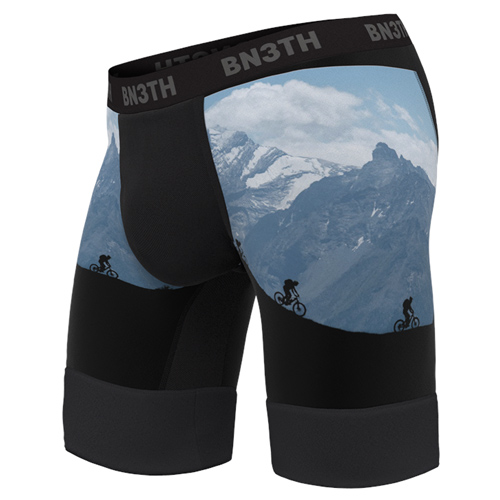
Price: $90CAN / $70US
Sizes: XXS-XXL
Colours: Black
Outdoor Vitals Stormloft Down Quilt
The beauty of quilts like the Outdoor Vitals for bikepacking in the BC backcountry? Lightweight and flexibility. I wanted something that packed down to the size of a Nalgene and didn’t weigh much. Check. I needed something to keep me comfy when temps were high at night and low in the a.m.. Check. OV is a new-to-me brand and I was really impressed by the product.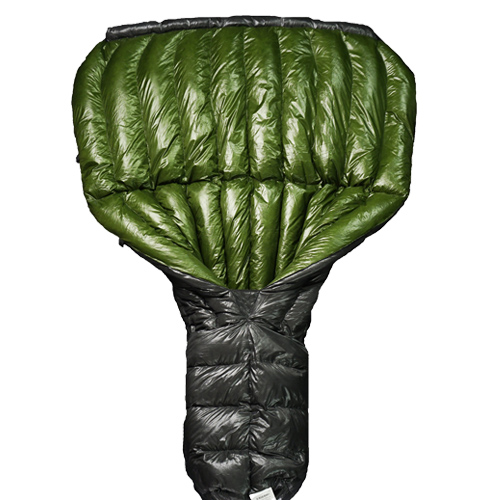
Price: $399.95CAN / $314.97US
Sizes: Regular / Long
Temperature Rating: -17°C / 0°F
Colours: Green