

Trip Report: Bugaboo to Rogers Pass Ski Traverse
The Bugaboo to Rogers Pass Ski Traverse is considered to be one of the ‘Grand Traverses’ and quite possibly the most popular given its modest length of 130+ kilometres and 30,000 feet of elevation gain. As the name suggests, the traverse runs from Bugaboo Provincial Park in the south to Rogers Pass in the North, spanning the Purcell and Selkirk Mountains in the process. Most parties complete the traverse in 8-10 days with at least one food cache to resupply midway. The route is very demanding and requires glacier travel skills, route finding and the ability to navigate avalanche terrain. First pioneered in 1958 by Americans Bill Briggs, Bob French, Sterling Neale, and Barry Corbet, the Bugs to Rogers Traverse has become a staple on any would-be ski guide's resume and skilled weekend warrior’s wish list.
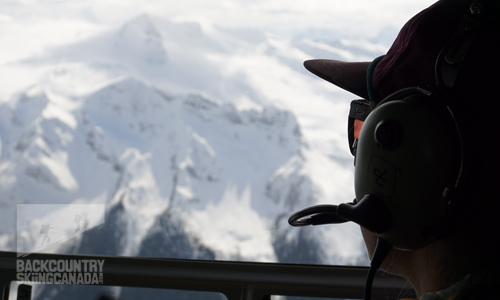
Burying food caches on the flight into Appleby.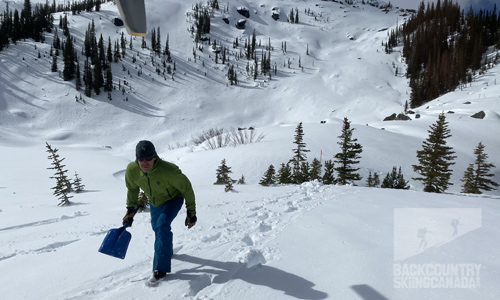
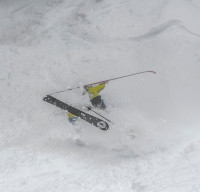
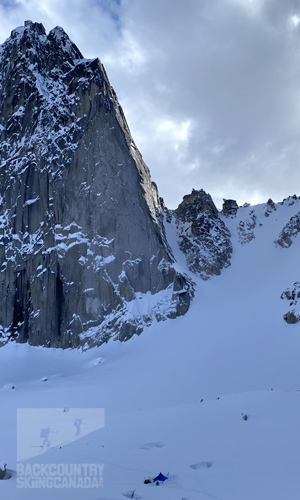
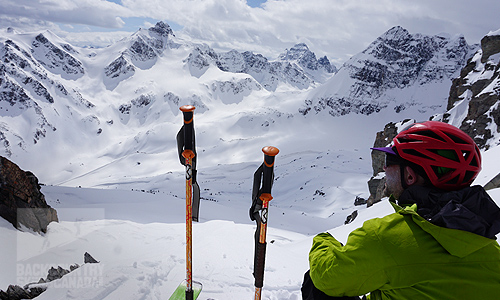
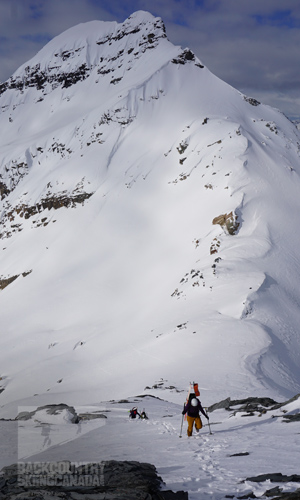
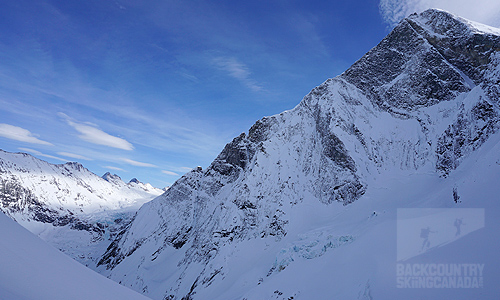
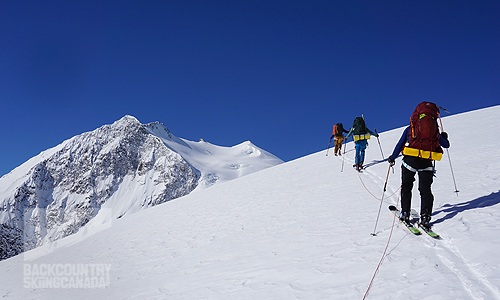
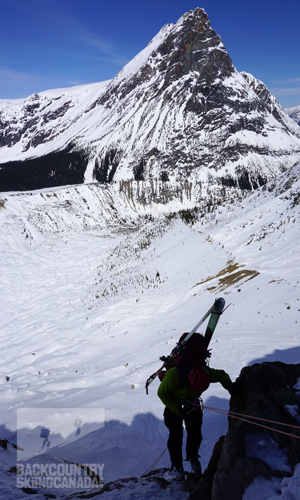
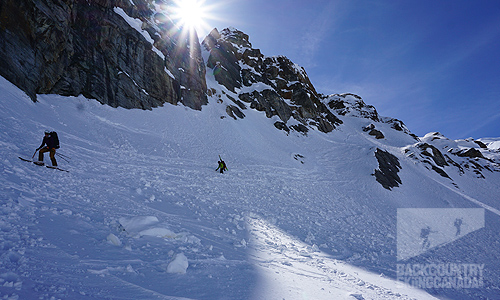
The first crux of the trip, high above our small tent at the bottom of the photo.
Having had the Bugs to Rogers Traverse on my ‘to-do list’ for several years, I immediately said “yes” when a group of friends mentioned they were interested in tackling it. The plan was to complete the traverse in eight days (weather dependent) with a contingency for nine or ten days if needed. To facilitate a more enjoyable trip, we would drop two food caches along the heli flight to Applebee Camp in Bugaboo Provincial Park. To do this, we chose to hire Alpine Helicopter out of Golden, which has a Park Use Permit or PUP which is required to land in the park. Our first food cache would be after three days on the traverse at the headwaters of the Vermont Creek, under the shadow of Azurite Mountain. The second food cache would be located another two days along the route on the high west ridge of Silent Mountain before descending into the Beaver Valley. This second cache location was strategically placed to provide an option of traversing down the Beaver Valley towards the Beaver Outlook should the weather not cooperate to head directly into the Battle Range of the Selkirks.
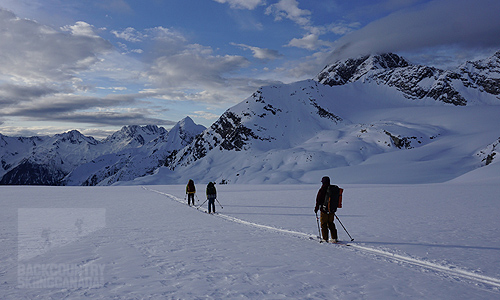
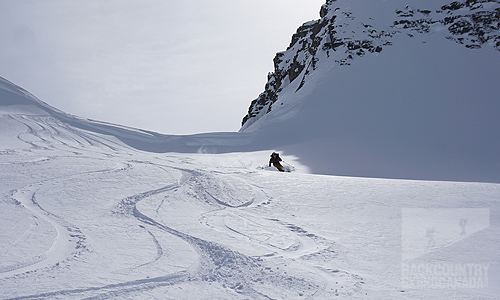
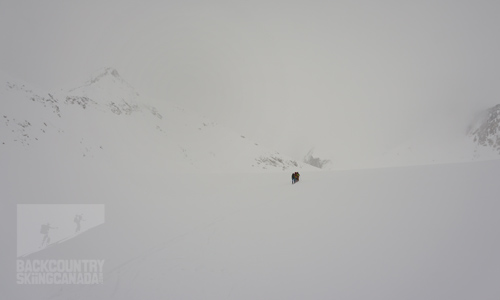
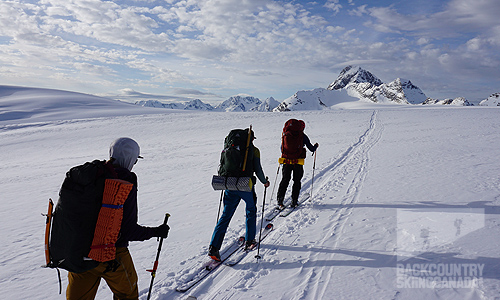
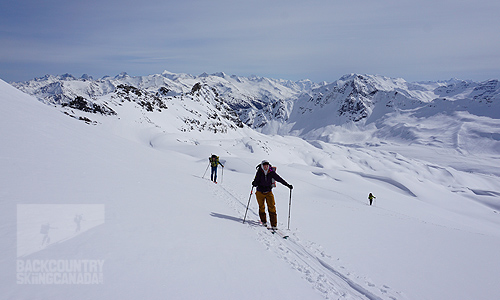
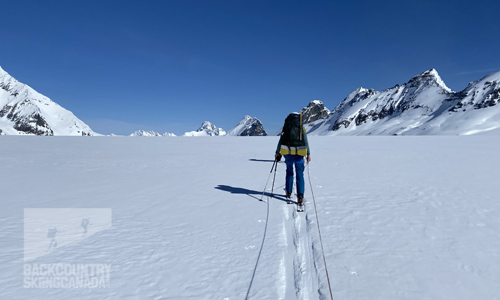
It's not all 'up' on the traverse, there was some really great north face skiing and of course, white out visibility.
The Bugs to Rogers traverse is a challenging ski mountaineering adventure, and you will need to have your glacier travel, crevasse rescue and white-out navigation dialled. The weather plays a big part in the exact route you will take, as some days you are forced down low into the trees to forego a high mountain pass. While not ideal (and definitely not easier), decisions like this have to be made on the fly as avalanche danger increases from snow loading or solar inputs. We were forced to take the low route on two occasions. The first was the Bobby Burn drainage, since we arrived too late in the day to summit Malachite Col, and again in the Beaver Valley, where a persistent slab was still lingering in the Battle Range. It’s important not to have ‘must-do’ objectives but to remain flexible and make wise group decisions in order to be able to keep moving and pick the safest line to get you where you need to go.
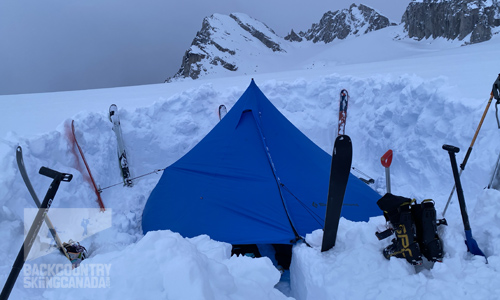
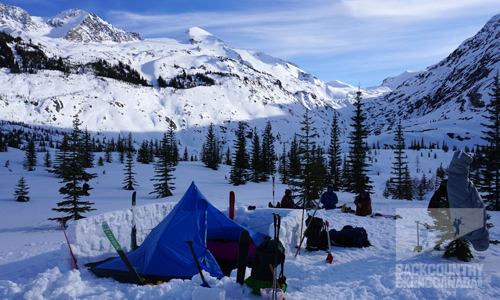
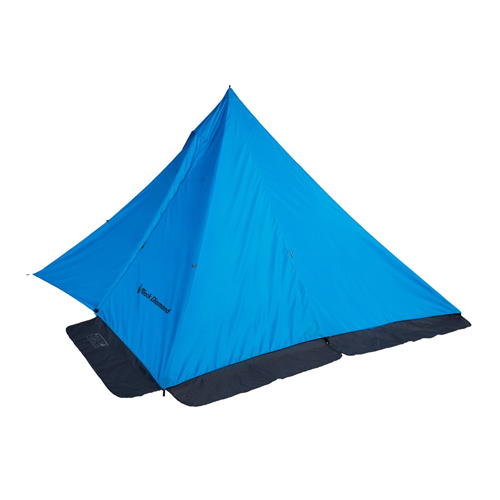
Our Mega Snow Tent was home for the week.
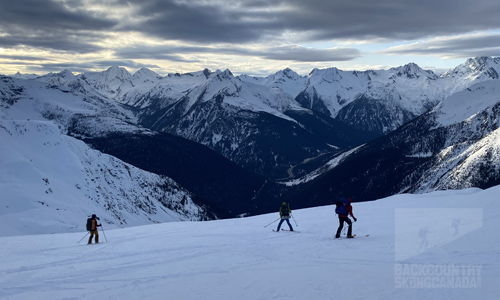
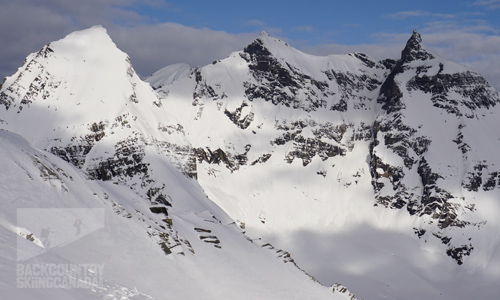
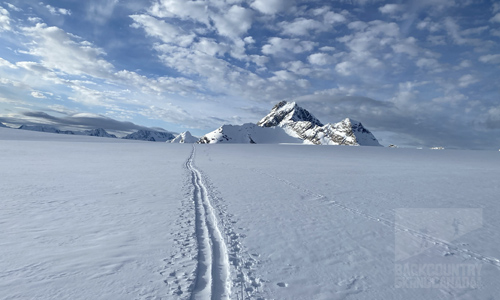
The views abound when we make time to enjoy them.
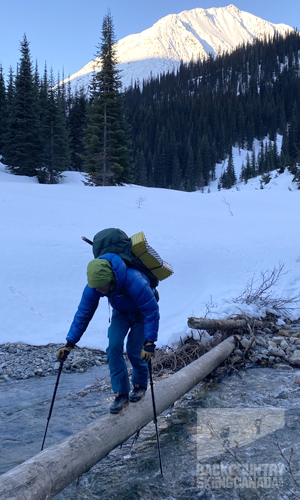
Mandatory creek crossings and boot packs.
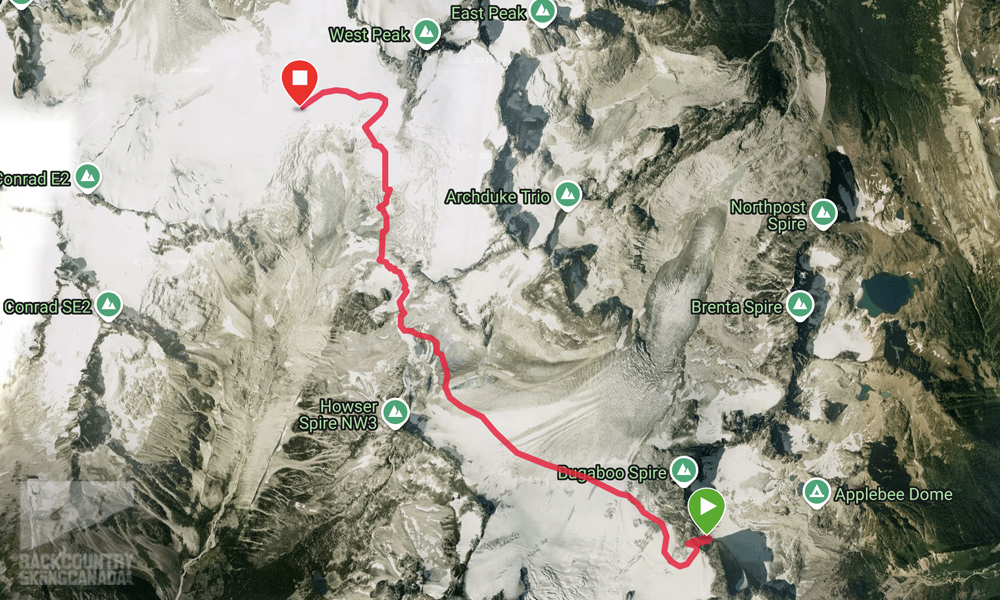
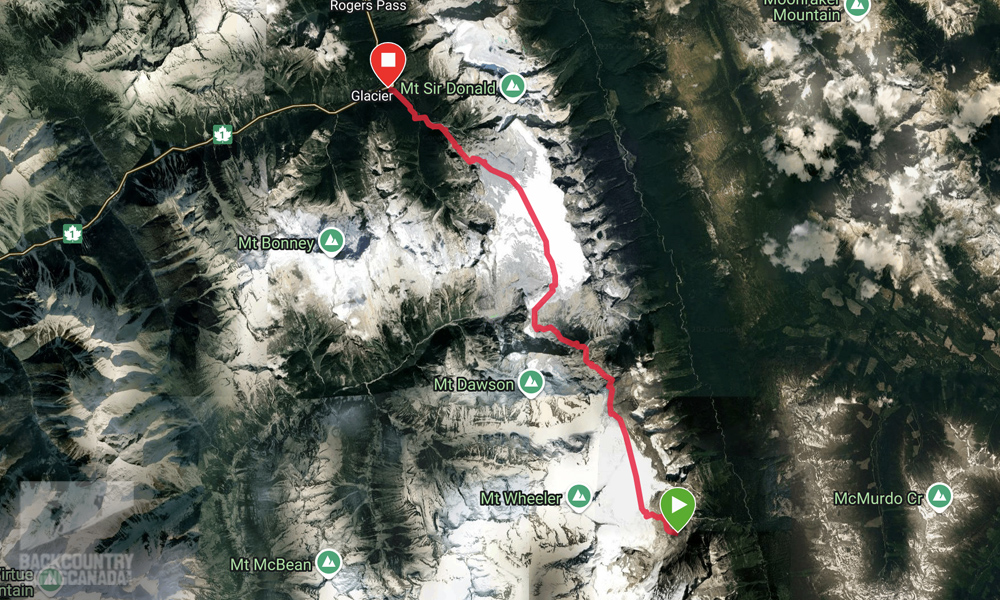
With the variation of the Bugs to Rogers traverse that we completed, we ended up covering a distance of 141.13km with an elevation gain of 8,345m / 27,378ft over the course of seven days. While we had planned on the traverse taking eight days, the weather came into effect on day six, and in order to beat a wet storm rolling in, we combined day six with the mileage of day seven to come out a day early.
Big terrain requires sharp skills and educated decision-making daily.
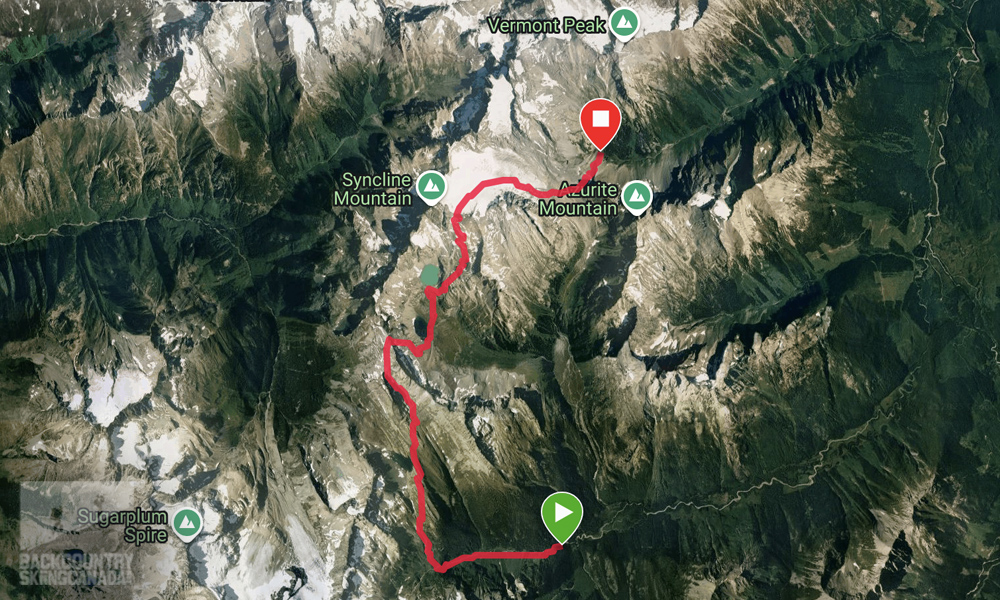
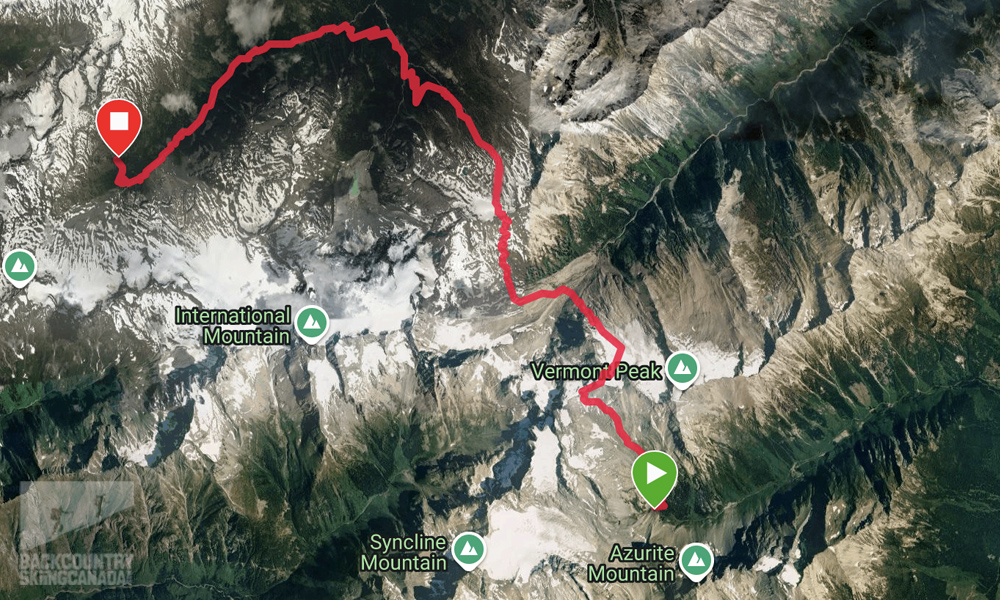
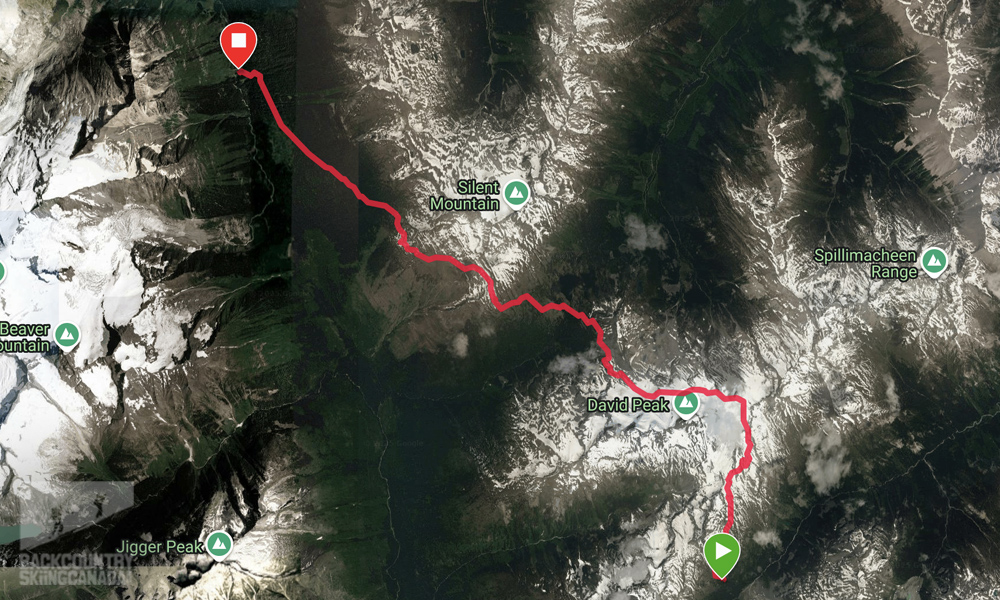
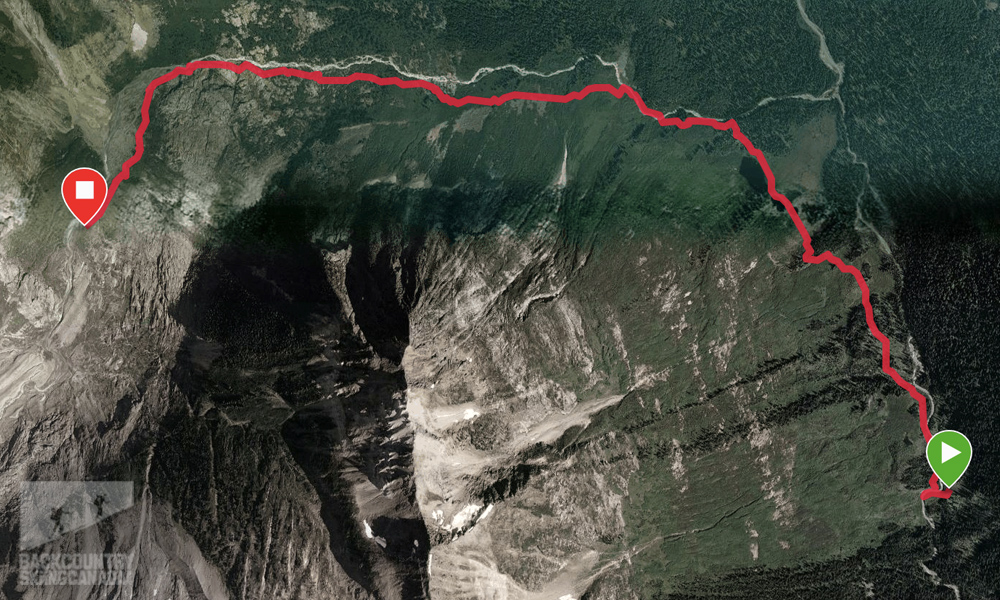
Here’s a recap of each day’s stats and a map of exactly where we went and some thoughts as to why:
Day One:
Distance: 10.56km
Elevation Gain: 606m / 1,988ft
Duration: 5:56 hours
Details can be found here.
The first day of the traverse saw us pinned down under Bugaboo Spire thanks to a storm that had rolled in overnight and dumped 10-15cm of new snow. The first crux of the trip and arguably one of the most difficult in less than ideal avalanche conditions is climbing up to the Bugaboo Snowpatch Col. While you can go around Snowpatch Spire to get onto the Vowell Glacier we opted to wait and see and as luck would have it another group arrived and decided to put in the skin track for us by midday. While still not ideal, we were more comfortable knowing that the slope had been climbed without sliding. Once on the Vowell Glacier, we climbed up to Bill's Pass, which proved challenging to find in near white-out conditions. Thankfully, GPS led us in the right direction, and we could get momentary glimpses of any overhead danger or exposure underfoot. Due to a late start and challenging travel conditions (snow, wind and poor visibility), we decided to camp on the massive Conrad Icefield at over 9,000ft just short of our first day's goal. We dug in camp and made the best of it, trying to stay warm with temps plummeting to -16 overnight.
Day Two:
Distance: 24.86km
Elevation Gain: 833m / 2,732ft
Duration: 10:05 hours
Details can be found here.
Day two started sunny but very cold and windy which made it feel like mid-winter up high. We traversed the never-ending Conrad Icefield and went up and over Thorington Pass. We felt it was too late in the day to summit Climax Col, given the sun’s effect on the stability of the snow on such a steep slope. Rather than camp in place and wait for the cold of morning to re-stabilize the snow, we voted to keep moving and made the call to go low into Crystalline Creek, where we camped in the valley bottom below Snowman Lake. This provided a much-needed warmer night's sleep, complete with fresh water from the creek.

Day Three:
Distance: 19.5km
Elevation Gain: 1,670m / 5,479ft
Duration: 9:48 hours
Details can be found here.
Day three proved to be a more typical spring day with sunshine and warmer temps, which brought along isotherms snow, and sunburns all around. We climbed out of the forest relatively quickly and had to surmount a waterfall with boot crampons before we could don skis again to climb two passes north of Snowman Pass. We then skied down and then back up onto Syncline Mountain, where we had one of our longest ski descents of over 2,000ft with some of the best north-facing snow of the trip. Once we reached Vermont Creek, we found our first food cache and were resupplied with white gas, snacks, fresh socks and food. Thanks to two bigger days we were now back on schedule and we quickly set up camp and burnt our food cache boxes (and collected the screws in order to carry them out with us).

Day Four:
Distance: 24.45km
Elevation Gain: 1,833m / 6,013ft
Duration: 10:46 hours
Details can be found here.
Day four would turn out to be one of our biggest days, and see us once again being forced to ski down to the valley bottom to avoid the avalanche risk on steep south-facing slopes that had rapidly warmed with the full sun and warm temps. The morning started with a long side hill traverse to Syphax Col, where we had to boot pack with crampons up to a small summit in order to be able to ski down to Malachite Creek. With Malachite Col out of the question unless we stopped for the day and camped overnight, which would put us behind schedule again, we decided to climb to Carbonite Col just west of Carbonate Mountain. Just shy of the Col, a CMH Helicopter landed above us, and a Helii-ski guide skied over to us to offer us some freshly baked cookies. This incredible gesture put some much-needed gas in the tank so we could keep pushing towards our goal of the Kingsbury Cabin. Once over Carbonite Col, we skied down to an old mining road which took us to Carbonate Creek and ultimately over to Bobbie Burns Creek. From here it was a long and challenging slog through the forest to Kingsbury Cabin, which was fully booked, so we again pitched the Black Diamond Mega Snow, prepared dinner and were in bed by 8:00 pm, exhausted.
Day Five:
Distance: 21.66km
Elevation Gain: 961m / 3,153ft
Duration: 9:21 hours
Details can be found here.
We woke to high winds in the alpine, so we took shelter in the Kingsbury Cabin for a few hours after the previous group had left. We warmed up, dried out our gear and then packed up and continued on our way. Some challenging visibility meant route finding was not easy, and the entrance to the Spillamacheen Glacier was more difficult to find than it should have been. Once over the glacier, we went through Silent Pass and skied down to Silent Lake and then up to the West shoulder of Silent Mountain, where we found our second and final food cache of the trip. Since we could not burn the cache boxes up high, we decided to dismantle them and carry them down into the Beaver Valley. Rather than ski fall line, we contoured as far down the valley as we could in order to put ourselves in the best possible position for going up to the Beaver Valley Overlook the next morning. We previously had a group discussion and felt that ascending into the Battle Range was not a safe option due to a lingering, persistent weak layer and that this workaround would prove safer.
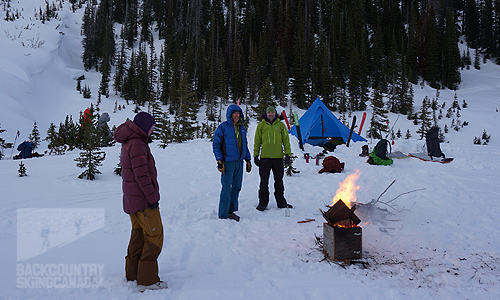
Food cache box bonfire to pass the time.
Day Six:
Distance: 6.74km
Elevation Gain: 431m / 1,414ft
Duration: 4:16 hours
Details can be found here.
With high hopes of a relatively short day and camping on the Deville Neve that evening, we got up at 4:30 am, broke camp and tried to beat the sun before it warmed up the 3,000ft south face we needed to climb in order to get onto the Deville Neve. Sadly, when we arrived at 10:30 am, the snow was isothermal and too dangerous to climb, so we decided to make camp and take a well-deserved rest day in the sunshine and build up our energy for an early start to summit the steep south face of the Beaver Overlook.
Day Seven:
Distance: 33.36km
Elevation Gain: 2,008m / 6,588ft
Duration: 14:38 hours
Details can be found here.
With an early start and no breakfast, we were on the move by 5:00 am and at the Beaver Outlook before the sun hit the snowy south slopes. We roped up and crossed the Deville Neve with ease, thanks to our quick and methodical pace. We arrived at the Deville Headwall and unwittingly bypassed the first rappel station and simply belayed into the second set of anchors. We had an uneventful rappel down the Deville Headwall and skied down to the moraine, where we had to skin up to the Glacier Circle Cabin. Given that the weather was moving in and temps were going to soar, we decided to keep moving in order to avoid a wet slog across the Illecillewaet Neve the next day. So, we pushed on adding another 3,000ft climb to our day. The climb out of Glacier Circle is very steep and puts you under the overhead hazard of the Witch Tower. Since this is not an ideal combination, we decided to wait until the snow had some time to cool in the shade of the waning sun. Because the Katabatic winds had begun to pick up as the day wore on, we felt comfortable that the snow would be firm enough to ascend with limited danger, so we pressed on. Once on the Illecillewaet Neve, we witnessed a large snow sluff/avalanche off of the Witch Tower, but luckily, we were out of harm's way by the time it came down. We crossed the Illecillewaet Neve with the same determination as the Deville, but this time the light was fading, so our pace was a little more hurried. On the ski down Glacier Crest, we were treated to refrozen breakable crust but eventually made it to Roger Pass and the Trans Canada highway, where we had to now flag down a ride to rendezvous with our car back in Golden.
After seven days, 141.13km and 8,345m / 27,378ft of gain, we had made it to Rogers Pass and completed the traverse. While we were happy to have made it, the late hour, hunger in our bellies and complete exhaustion after fourteen hours on the move made the celebrations brief. Instead, we focused on the tasks at hand: get the car, get some food, find a hotel, have a shower and sleep.
Mandatory rappels into Glacier Circle to keep things interesting.
The contrast of the Illecillewaet Neve and the run out of the Deville Headwall.
Here is a list of some gear that I took on the Bugaboo to Rogers Pass Ski Traverse that made a huge difference to my comfort and ultimate success completing it.
Black Diamond Mega Snow 4P Tent
No ski traverse is complete without the Mega Snow 4 Person Tent from Black Diamond. This burly single-wall 4-season shelter is ideal for four people or to be used as a cook tent. It has perimeter snow valences to seal the tent's edges from blowing snow, and by digging the platform down into the snow, it substantially increases the usable internal space. A built-in venting system allows moisture and vapour to escape without opening the door. A carbon fibre centre pole is included to allow for quick and easy set-up, but we simply used our ski poles strapped together to save even more weight. Light, roomy and super compact means that the Mega Snow 4P Tent is the only real option for a ski traverse of this length, as it will save on weight and valuable pack space for a group of four.
Price: $559.95 / $499.95US
Area: 7.29m2 / 78sq ft
Average Packed Weight: 1650g / 3lb 10oz
Capacity: 4
Dimensions: 270 x 270 x 270 165cm / 106 x 106 x 106 x 17in
Packed Size: 37 x 15cm / 15 x 6in
Weight: 1650g / 3lb 6oz
Gregory Paragon 70L Pack
My pack of choice for the traverse was the Paragon 70L from Gregory. It is lighter than most 70L packs yet still has all the features I was looking for and enough room to carry all my gear plus food. The full-length zippered side access panel made digging deep into the pack easy to retrieve any items I needed, and it was able to carry skis A-frame with ease. The pack fit super well and carried my 35-40lb load without issue, thanks to the adjustable back panel and hip belt, which Gregory calls their “FreeFloat Hybrid Suspension” system. The mesh back panel breathed well and provided adequate airflow to keep me cool on those hot sunny days. The mesh stuff pocket on the front side was ideal for stowing my water bottle and shell while the hip belt pockets were where I stashed items I needed close at hand, like sunscreen, lip balm, snacks and buff. While not a ski mountaineering-specific pack, the Paragon 70L was ideal for this adventure, it’s a Gregory after all, and they make the best packs in my opinion.
Price: $399.95CAN / $289.95US
Weight: 3.80lbs
Volume: 70L
Max Carry Weight: 50lbs

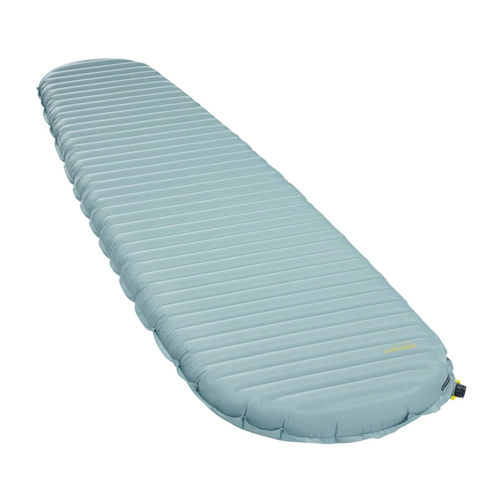
Therm-A-Rest NeoAir XTherm NXT Sleeping Pad and Air Head Down Pillow
The Bugs to Rogers Traverse requires that you winter camp most nights, as there are only two cabins and one shelter along the route. Since your schedule will not always line up with your expectations, it is advisable to carry a very light and warm sleeping pad. This is why I chose the Therm-A-Rest NeoAir XTherm NXT mat. It has an R-value of 7.3 and weighs only 570g or 1lb 4oz, so it is one of the warmest mats on the market for its weight. Therm-A-rest’s Triangular Core Matrix construction and ThermaCapture technology are what’s behind the mat's impressive warmth-to-weight ratio. At 7.6cm / 3in thick, the NeoAir XTherm is incredibly comfortable without being noisy, and the patented WingLock Valve provides fast one-way inflation and rapid deflation along with the ability to micro-adjust the amount of air in the mat for the perfect night’s sleep. The ideal companion to the NeoAir XTherm Mat is Therm-A-Rest’s Air Head Down Pillow—like the NeoAir XTherm Mat, it is light, comfortable and keeps you off the snow and warm no matter how cold it gets.
Price: $324.95CAN / $239.95
R-Value: 7.3
Weight: 570g / 1lb 4oz
Width: 64cm / 25in
Length: 196cm / 77in
Thickness: 7.6cm / 3in
Packed Dimensions: 28 x 13cm / 11 x 5in
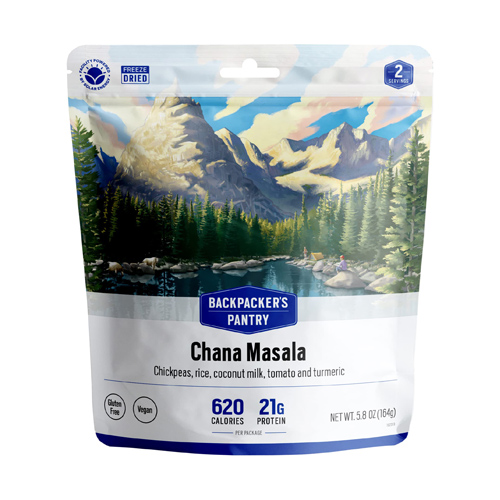
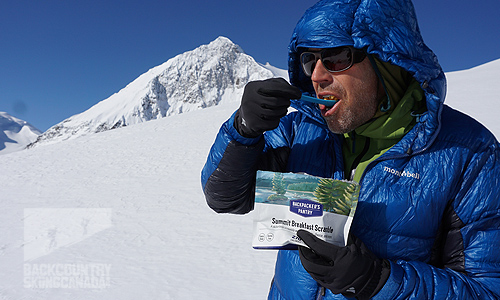
Backpackers Pantry
Even with two food caches along the route, you will still want to have food that is light and easy to make, and this is why our entire team took freeze-dried meals from Backpackers Pantry. The company has been family-owned since 1951, and all of its products are made in the USA—they also give 1% back to the planet. The options include breakfast, entrees and desserts, all made with quality ingredients that taste great. The dinners I chose had high amounts of protein and calories, which are needed on such a high-endurance adventure. My personal favourites are Pad Thai with Chicken, Lasagna and Fettuccine Alfredo with Chicken. Boil water, add to the pouch, wait and then feast!
Prices: $14.25 - $18.50CAN / $9.99-$12.99US
Flavours: Several for dinner, dessert and breakfast
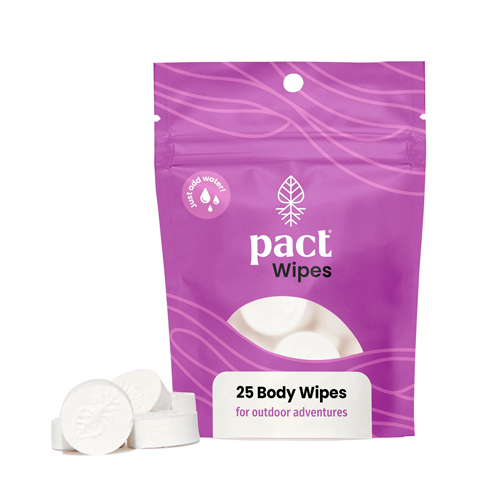
PACT Outdoors
One of the most innovative items that we took on the traverse had to be the Body and Bathroom Wipes from PACT Outdoors. These wipes are dehydrated and compressed to save weight and space, and with just a small amount of water, they are rehydrated and ready to use once unfolded. The Body Wipes unfold into a 12” towel that is capable of cleaning dirt and sweat, while the Bathroom Wipes unfold into a 9” towel and provide the cleaning power of a traditional wet wipe. They are both made of 100% woven plant-based material which is free of harmful chemicals often found in toilet paper and conventional wipes, including plastics, fragrances, chlorine, alcohol, and PFAS (or forever chemicals). This means they are better for your body and the environment, and they will decompose 100% in 95 days. Why pack rolls and rolls of bulky toilet paper when ultra-compact and dehydrated PACT Outdoors wipes are far superior.
Price:
PACT Body Wipes (25-pack) $20CAN / $15US
PACT Bathroom Wipes (100-pack) $27CAN / $20US
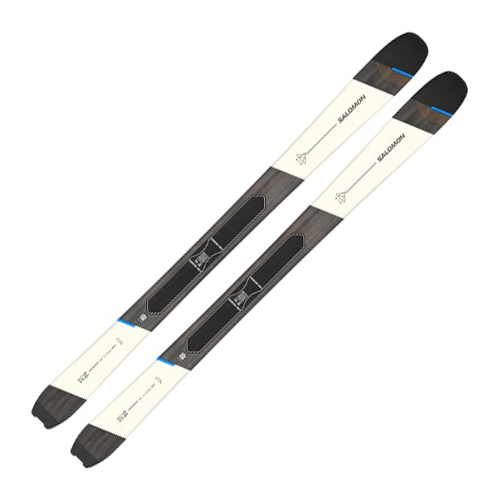
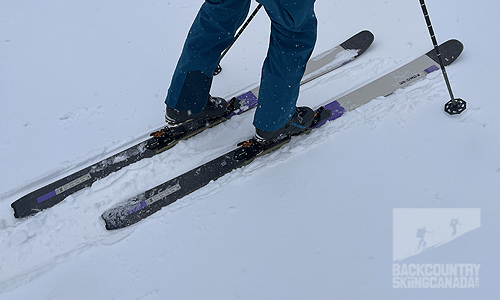
Salomon MTN 96 Carbon Skis & MNT Summit 12 Bindings
On the Bugs to Rogers Traverse, you’ll be climbing 99% of the time and only briefly skiing, so a narrower ski is recommended for less weight and energy output. With this in mind, I chose the Salomon MTN 96 Carbon Skis mounted with their Summit 12 Bindings. This made for a ski setup weighing only 3,990 for the pair—impressively light yet high-performing.
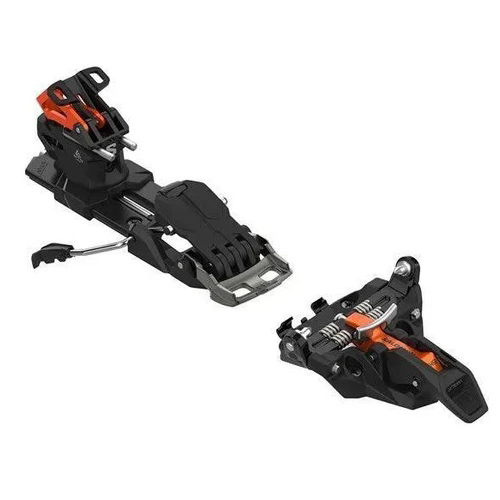
The MTN 96 Carbon Skis are, of course, made with a Sandwich Sidewall construction which includes a full Karuba wood core, Cork damplifier and of course Carbon Basalt Fibre. There is also an edge-to-edge titanal insert underfoot, running throughout the ski, for maximal power and increased hard snow edging. This plate also allows for Salomon’s Summit 12 Bindings wide screw pattern which has patented toe guiding elements allowing for the correct toe position to facilitate easy step-in. In the heel, there are two climbing aids which are easy to engage with your pole, but there is no need to turn the heel piece to engage them, saving time and energy. There is, of course, a crampon attachment point which is mandatory for this traverse. This setup is ideal for ski touring, light for the climb but engineered for challenging and aggressive downhills as well.
Salomon MTN 96 Carbon Skis
Price: $899.95CAN / $799.95
Price: $699.95CAN / $599.95US
Dimensions: 117/96/131
Weight: 3160g / 6.9lb (per pair)
Turn Radius: 20m
Salomon MTN Summit 12 Bindings
Weight: 830g / 1.8lb (pair)
Release value: 6-12
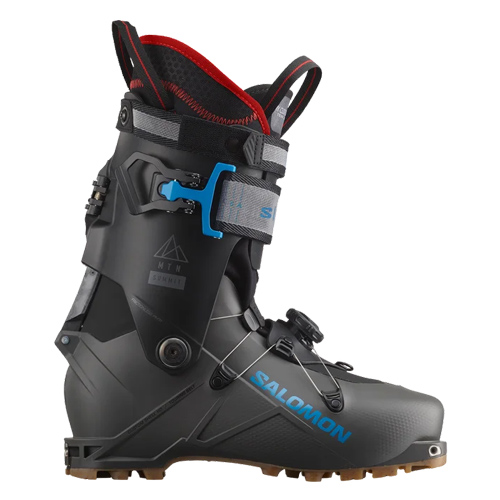
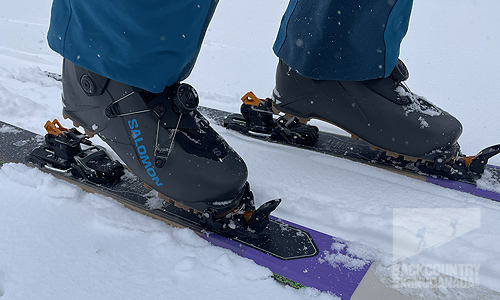
Salomon S/LAB MTN SUMMIT Boots
A light ski boot is ideal for the Bugs to Rogers Traverse, but you want to be sure that you don’t give up any performance for weight savings and this is why I chose to wear Salomon’s S/LAB MTN SUMMIT Boots. They use an ultra-light Ultramid polyamide cuff with a Custom Shell HD that allows for heat and modified lower shell boot fitting, while the fibreglass spine combines to provide a rigid, light, yet solid performance. A waterproof gaiter makes for a lighter boot with a 75° range of motion, while the built-in BOA Fit System delivers a micro-adjustable customized fit. Inside the S/LAB MTN SUMMIT Boots, you’ll find Custom Fit Tour light liners made with Ultralon foam construction for more precision, lightness and a snugger fit. With only the BOA Fit System and a 70 mm wide Dual Powerstrap, you are able to get a very snug fit while keeping the entire boot weighing under 2.4kg/5.25 lbs. Salomon has perfected the balance between lightweight and performance with the S/LAB MTN SUMMIT Boots, making them ideal traverse boots that you can count on over the long haul.
To round out this Salomon Kit, you may also want to consider the MTN Carbon S3 Poles. They adhere to Salomon’s light and fast ethos and are made from 100% Carbon. Weighing in at just 249 rams for the pair, they still offer up a good amount of adjustability from 100-135cm in length.
Price: $899.95CAN /
Sizes: 22/22.5-30/30.5
Weight: 2360g / 5.2lbs (per pair)
Flex: 120
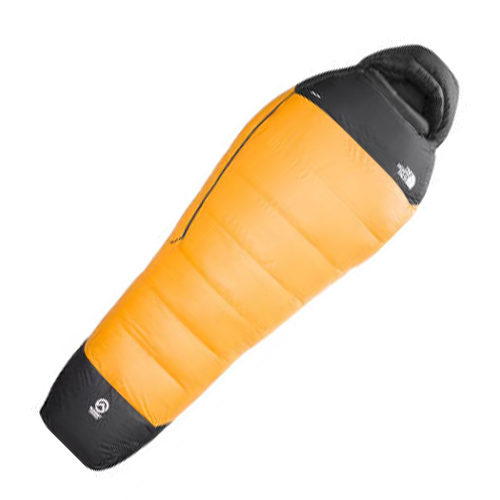
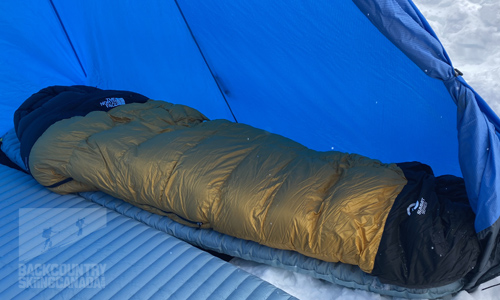
The North Face Inferno -40C/-40F Sleeping Bag
Although most people attempt the Bugs to Rogers Traverse in April, it is still full-on winter up high, and a super warm sleeping bag is a must. I chose The North Face Inferno because it's The North Face’s warmest expedition bag and uses 800 fill-power hydrophobic ProDown. This is crucial as a wet bag is a cold bag, and with hydrophobic ProDown, you can rest assured that you’ll always stay warm since it absorbs less water, dries faster and retains loft better than conventional down. The North Face also only uses ethically sourced Goose Down that meets the Responsible Down Standard for animal welfare. I initially wanted the -29C/-20F, but it was out of stock, so I went with the -40C/-40F version, as you can never be too warm. The North Face maximizes thermal efficiency by using trapezoidal side baffles to prevent cold spots and prevent down migration. It has a ½ length zip, a fitted hood and a multilayer draft collar to help reduce the escape of warm air.
A good night's sleep is mandatory to replenish your energy on such a long adventure, so be sure not to cut any corners when it comes to your sleeping bag and entire sleep system.
Features:
800 fill-power hydrophobic ProDown™ that absorbs less water, dries faster and retains loft better than conventional down.
Goose Down is ethically sourced and meets the Responsible Down Standard for animal welfare.
A generous profile gives you room to layer.
Trapezoidal side baffles prevent cold spots.
The fitted hood hugs the head and neck, so there’s nowhere for cold air to pool.
Full draft collar and hood overlap to prevent heat loss.
The hood can be adjusted on either side.
Internal insulated pocket.
Vaulted footbox.
Waterproof And Breathable Neovent Air™ Fabric Helps Protect The Head And Footbox.
½ length centre zip.
Roomy vaulted foot box.
Tie-down loops to secure your pad to your sleeping bag.
Includes a compression stuff sack and a home storage bag.
Materials:
Insulation: 800 Fill Prodown™; Responsible Down Standard (Rds) Certified By Control Union, Cu 843098
Lining: 30D Nylon Taffeta
Main Body: 15D Recycled Nylon Coated With Aluminized Xreflex™ Treatment
Head And Footbox: 15D Recycled Nylon Ripstop With Breathable Coating
Price: $989CAN / $830US
Weight: 1667g / 3lbs 11oz(Long)
Temperature: -40°C
Insulation: 800 fill-power water-repellent goose down
Technology: DryVent
Construction: Sewn-through, Baffle
Face fabric: 15-denier ripstop nylon, 15-denier nylon
Lining/backer: 30-denier nylon
Packed size: 31 x 56cm
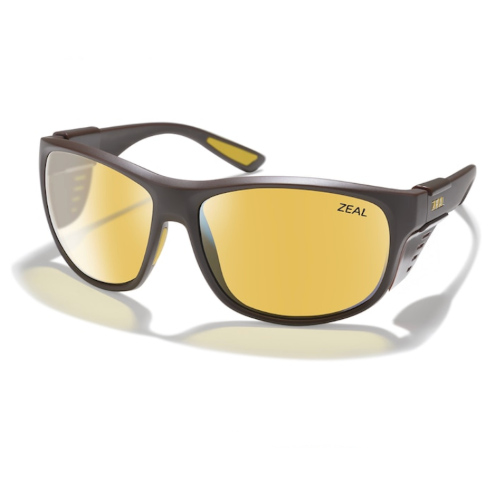
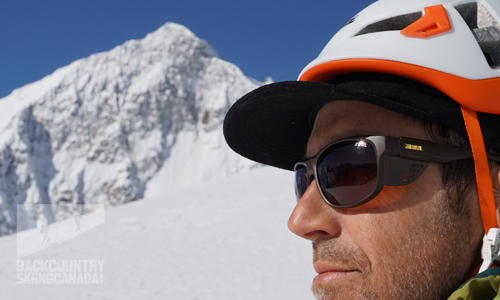
ZEAL Optics Westwater Sunglasses
ZEAL Optics’ new polarized Westwater Sunglasses are designed for paddling, ski touring and glacier travel thanks to their 8-base curvature design, which provides great protection and coverage from the elements. Attach the slide-on ventilated side panels, and you can instantly convert the Westwater Sunglasses into functional, fog-free glacier glasses. These removable side panels are ideal for keeping snow from blowing into the lenses—slide off the side panels and you have a stylish pair of frames for around town all summer long. The photochromic lenses, or what Zeal calls their ‘AutoSun Lenses which adjust to the ever-changing mountain light conditions while their polarized properties are ideal for paddling and fishing. With non-slip ProFlex material in the temples and nose bridge, the Westwater Sunglasses will stay put no matter the adventure.
The Westwater Sunglasses use ZEAL’s plant-based Z-Resin frames, which are made with a minimum of 45% bio-resin, which is good for the planet and even better should you unfortunately lose them in the wild. With their stylish look and technical attributes, the Westwater Sunglasses can be worn in the mountains and around town.
Features:
Polarized
Profile
RX Ready
Impact Resistant
Ellume Colour filtration
Z-Resin Bio-Plastic Frame
Pin Hinge
Scratch-resistant hardcoat
SPECS
Price: $259CAN / $229US
Colours: Matte Black/Horizon Blue lenses, Matte Brown/Auto Sun Lenses, Matte Grey/Dark Grey
Crossing the Illecillewaet Neve as the light fades and the adventure winds to a close, but not before having to ski breakable crust most of the way down to the Trans Canada Highway. The Bugs to Rogers Traverse is a challenge from the first day to the last.